KHTS Radio Santa Clarita Radio – Santa Clarita News


One of the wisest strategies that you can use is to repurpose content by creating videos out of blog content and spreading them in areas such as YouTube, Instagram, TikTok, and LinkedIn. However, reading through all blogs and editing voiceovers may take a lot of time-consuming, especially when you are alone as a content creator.
CapCut Desktop comes in at that point. CapCut PC has Text to speech AI and video-editing features, which will turn any blog post into a voice-narrated video with the utmost ease.
This tutorial will show you how to take your blog posts and make voiceovers of that same text in video format, available through the AI features in CapCut, which is sure to prove invaluable to educators and marketers, as well as influencers or anyone wishing to enhance their multimedia profile.
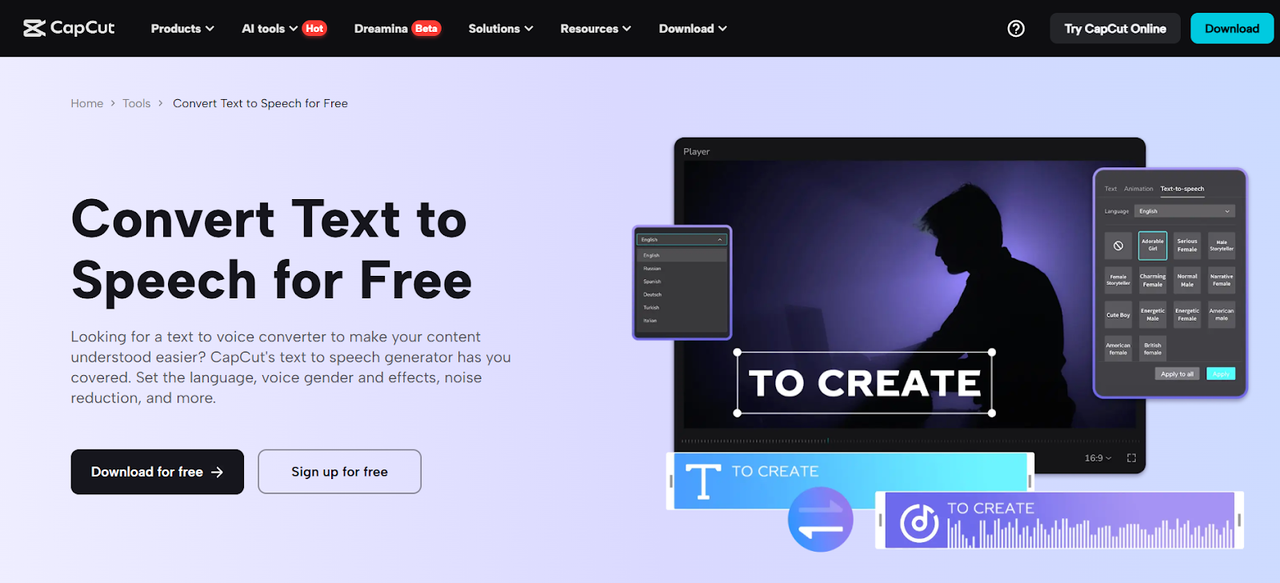
Why Repurpose Blog Posts into Voiceover Videos?
Since we live in a world that is constantly moving at a fast pace, it is not a reality that we are able to read in detail in terms of the blog. Voiceover video material meets the demand of various user needs and makes content more findable in the world of visual materials. In addition to this, videos enhance SEO, engagement, and the ecosystem of your content is multi-format and vibrant.
Introducing your written text to visuals and narration through an AI voice generator, you will make your blog posts have their second life faster and more efficiently than ever before.
Benefits of Using CapCut PC’s AI Tools for Blog-to-Video Conversion
The use of the AI-powered features in CapCut has a range of benefits as far as content repurposing is concerned:
Faster Workflow: By avoiding recording sessions, you save time on editing and other steps; all you have to do is paste your text, and an AI will create natural-sounding voiceovers.
Pro Narration: You can find a lot of voice styles, languages, and tones to align with your brand.
Integrated Editing: Add your script, voiceover, visual, and effects on one platform.
Multilingual Reach: Blogs can be transformed into videos that can be spoken in other languages to target various localities.
Best quality output: Another attribute of CapCut is the presence of editing functionalities such as the AI video upscaler, which provides a sharp image in its output.
This lean procedure will allow you to scale content using the same amount of time and money.
Step-by-Step Guideline: Convert Your Blog Posts to Video Voiceovers Using CapCut’s AI Tools
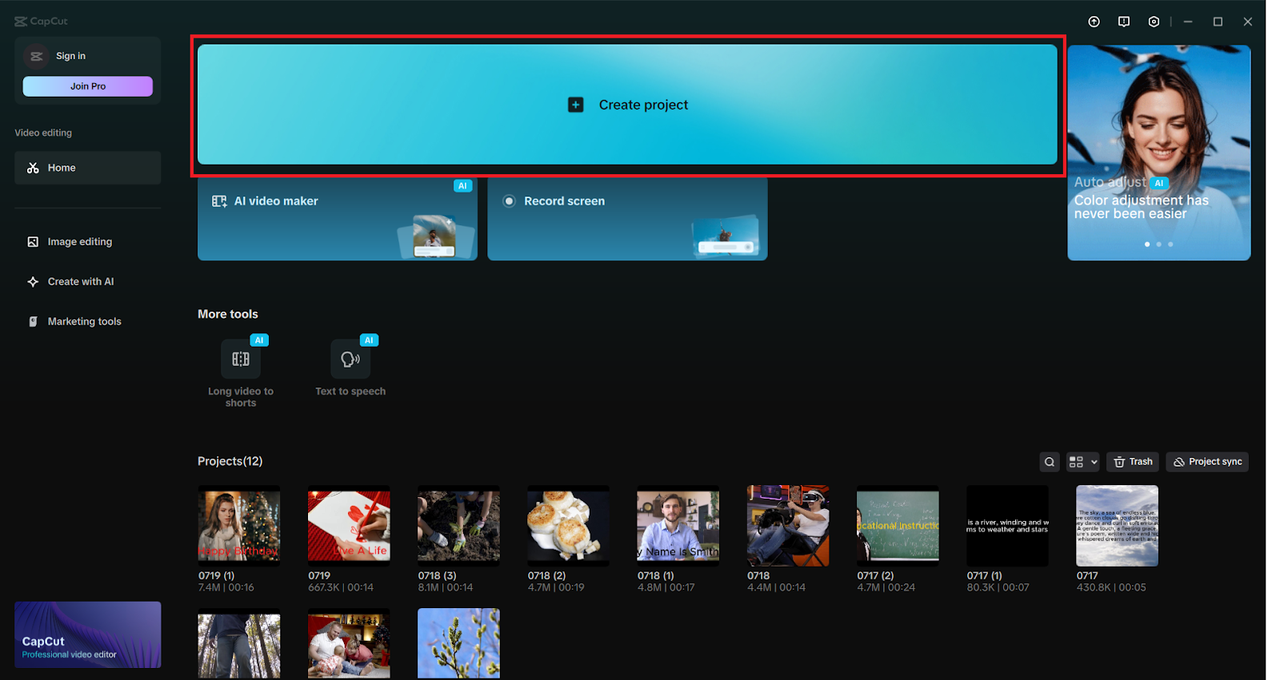
Step 1: Open CapCut Desktop and Start a New Project
Go to the desktop and open CapCut, click on “Create project”. Then go to “Import” to add video clips, B-roll, stock photographs, screen records, or anything that goes well with your blog post. Drag those assets to order on the timeline in the order you like.
Step 2: Extract Key Text from Your Blog Post
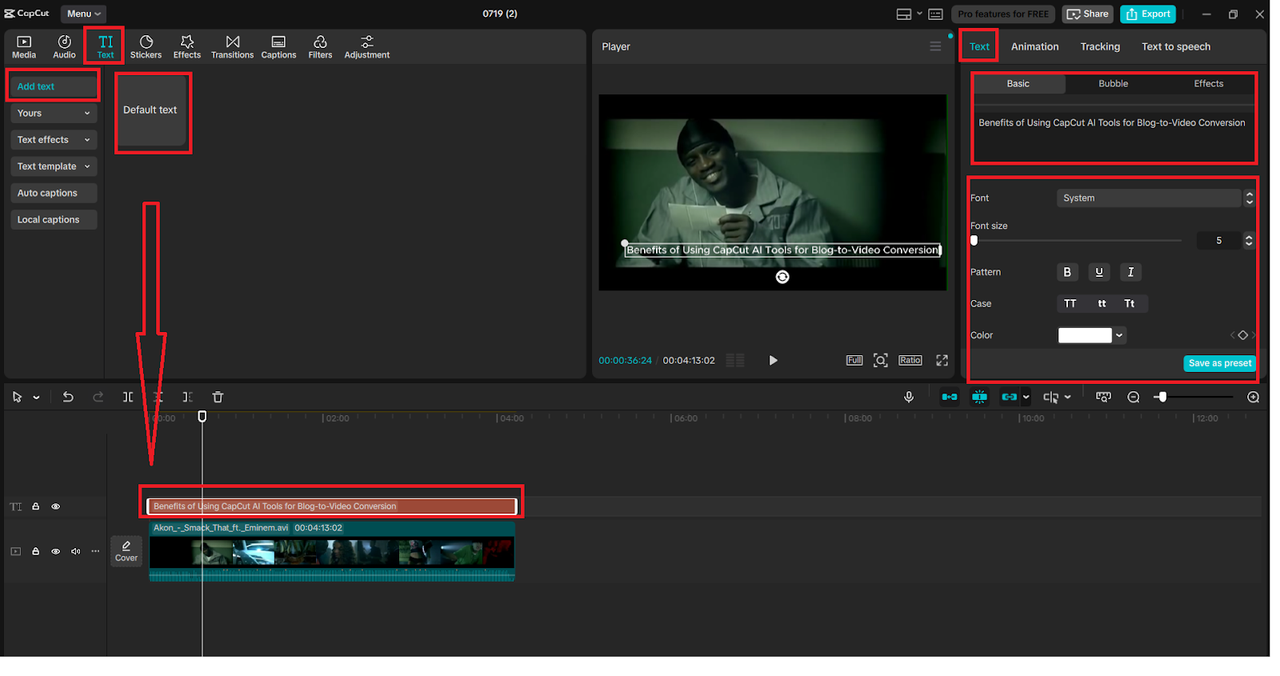
Go on and read your blog, then pick 4-6 important paragraphs or points. You need to open the “Text” tab on the left side of CapCut and paste the chosen blog content in a new text box after clicking on “Default text”.
Segment long text into smaller parts so that the videos can be paced well.
Step 3: Use Text-to-Speech to Create AI Voice Narration
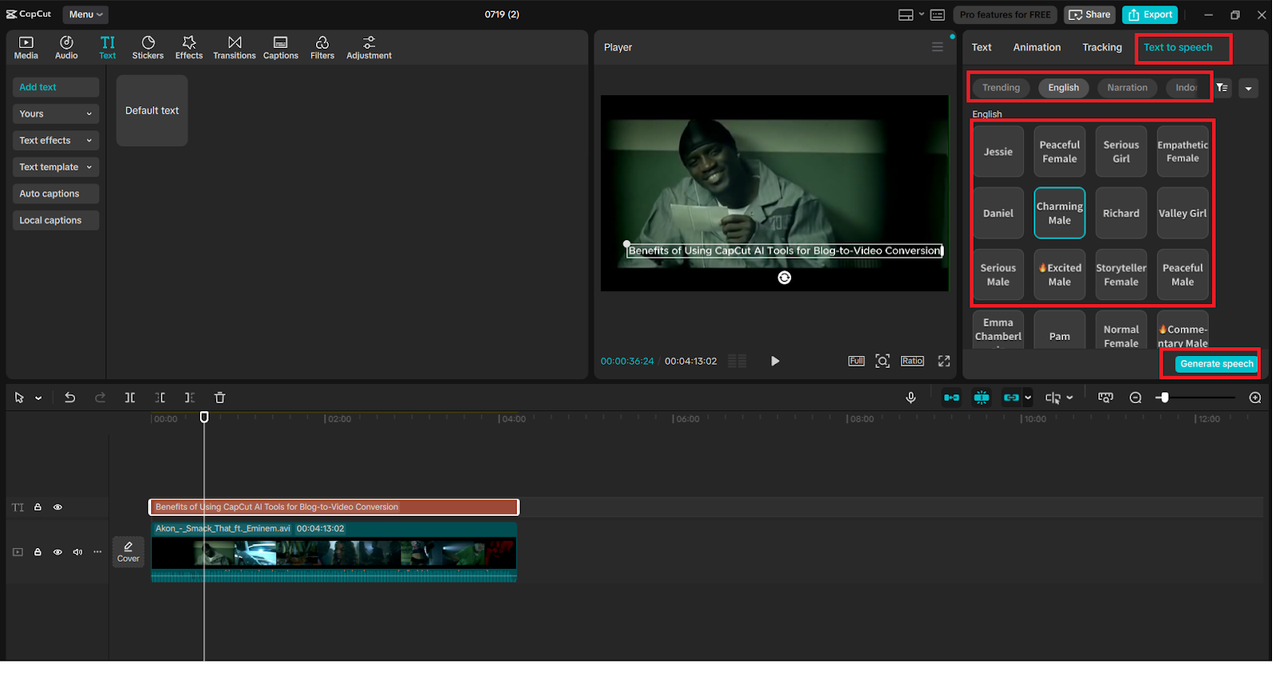
Touch the text box you have just created, and then in the top toolbar, you can choose “Text to speech”. Use the voice style, tone (calm, energetic), and language that resonates well with your video theme. After doing that, press “Generate speech” voice, and your blog text will be transformed into an AI-generated voice recording.
CapCut will automatically put the voiceover audio into your timeline, and syncing will be easy.
What this does is provide you with a robust AI voice generator so that you can present your crisp voiceovers without any microphone or any voice talent.
Step 4: Add Transitions, Filters, and Music
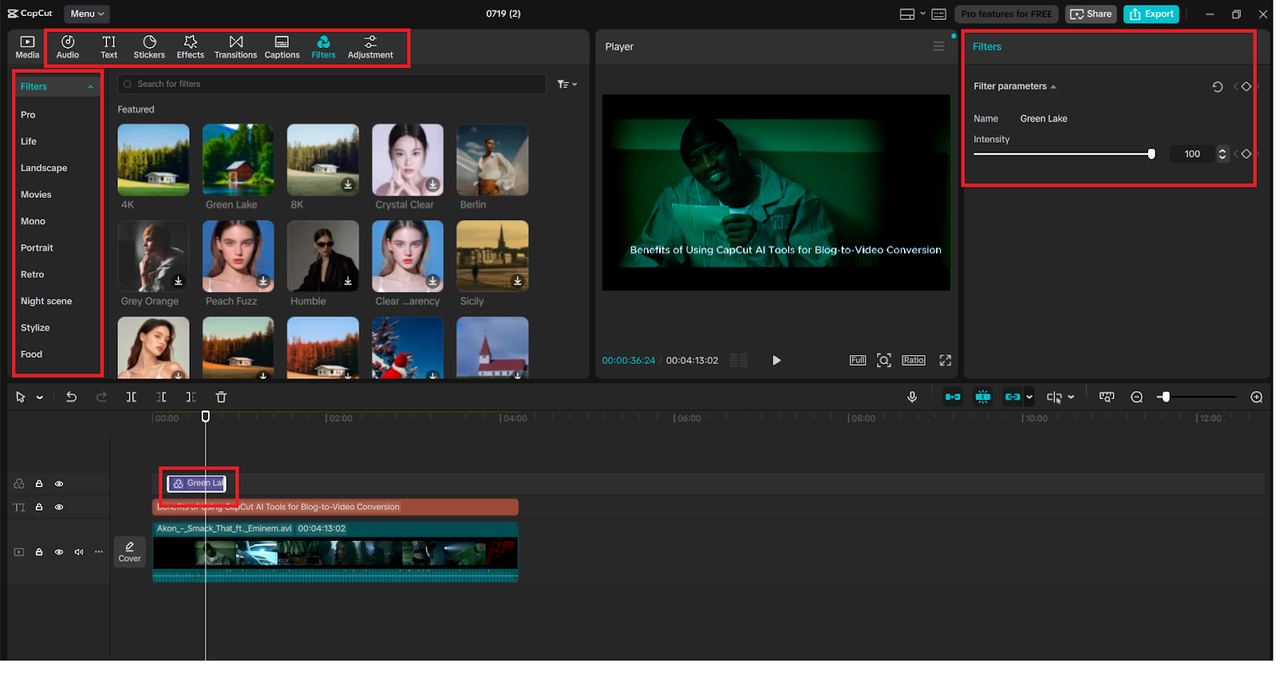
Engage your viewers through energetic material in your video. Under the “Transitions” Tab, add smooth transitions between the clips, or under “Filters”, add consistent color grading. You may also check the CapCut Audio library and drag a proper background tune to the timeline below the voice-over.
The background music should also be low to leave the AI voice as the highlight.
Step 5: Export Your Video and Share Across Platforms
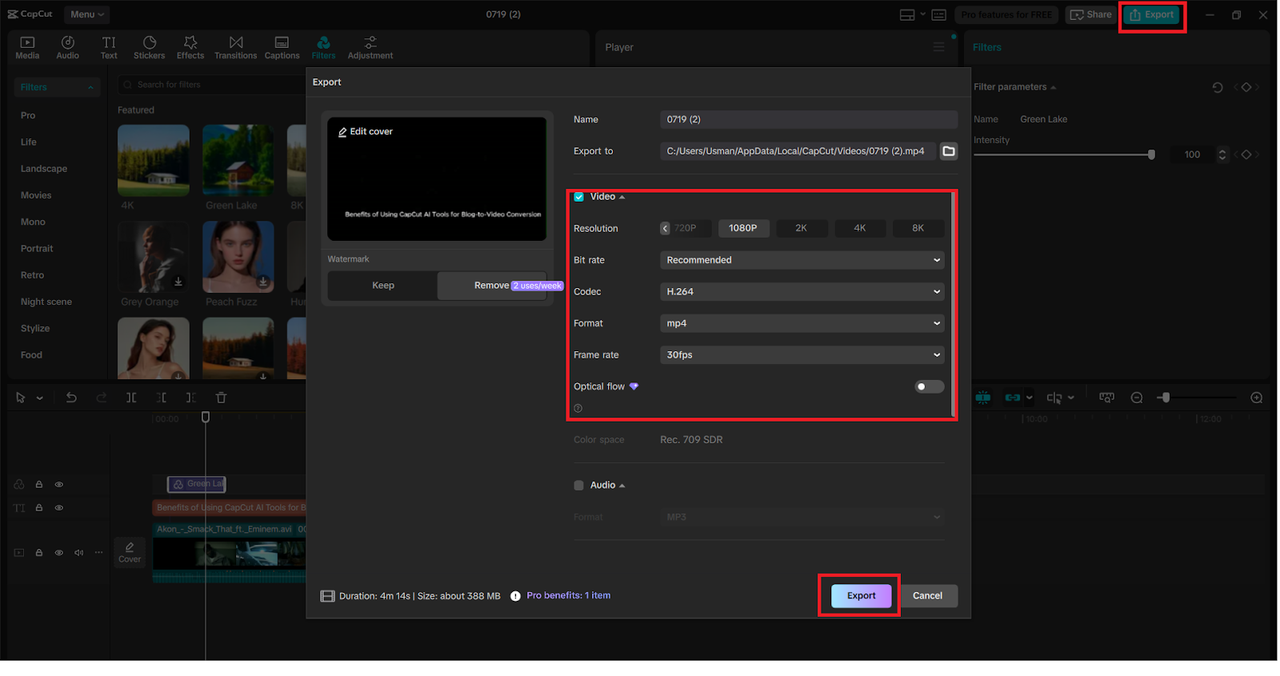
Once everything is in place, click “Export” at the top right. Choose the resolution (1080p recommended), format (MP4), and export destination. If you’re repurposing for multiple platforms, CapCut allows easy resizing and editing of existing timelines—ideal for creating versions for TikTok, Instagram Reels, or LinkedIn.
And if your visuals were pulled from screenshots or low-res stock images, consider using CapCut’s AI video upscaler for crisper results.
How “Text to Speech AI” Helps Build a Multimedia Strategy
The use of text to speech AI in CapCut allows creators to easily turn written text into a video format without additional efforts. This also improves your content strategy with all of your blog posts being able to be used in several different forms: as an SEO blog, a narrated YouTube video, short form clips, and even voice-over slide shows.
Recycling a single post to create various styles of videos means that you end up having more viewers, and you also do not burn out by having to create the content.
Final Thoughts
The conversion of blogs into video voiceovers using the AI features of CapCut is a sound decision by any content maker seeking to expand most cost-effectively. CapCut also features its own AI voice generator, easy editing user interface, and AI video upscaler (among other features) to help you create professionally polished content without the trouble of traditional video production.
Therefore, when you already have content in blogs that is gathering digital dust, it is high time to bring it alive using CapCut, and it is fast, easy, and powerful.